Express.js + TypeORM + MySQL 설정 방법

Express.js + TypeORM + MySQL 설정 방법에 대해 설명하는 페이지입니다.
Environment
- Node.js v20.11.1
- typeorm v0.3.20
- reflect-metadata v0.2.2
- mysql2 v3.10.1
목차
- 개요
- Step 1 - TypeORM 관련 패키지 설치
- Step 2 - 폴더 구조
- Step 3 - TypeScript Configuration
- Step 4 - .env 파일 생성
- Step 5 - entity 생성
- Step 6 - DataSource Configuration
- Step 7 - TypeORM 사용 예시
- Comments
개요
이번 글에서는 Express.js 애플리케이션에 TypeORM 적용 방법에 대해 설명하겠습니다.
Step 1 - TypeORM 관련 패키지 설치
다음 명령어를 입력하여 TypeORM과 MySQL을 사용하기 위한 database driver를 설치합니다.
typeorm: Node.js에서 JavaScript와 TypeScript로 사용할 수 있는 데이터베이스 ORM (Object-Relational Mapping) 라이브러리reflect-metadata: 데코레이터 구문을 분석하고 SQL 쿼리를 작성하는데 사용mysql2: MySQL 모듈dotenv: Node.js 서버의 포트, DB 관련 정보 등 다양한 정보를 .env 파일로 관리할 수 있게 해주는 라이브러리
npm install typeorm reflect-metadata mysql2 dotenv
Step 2 - 폴더 구조
먼저 다음과 같이 express.js 폴더 구조를 생성합니다.
├── node_modules
├── public
├── src
│   ├── database
│   │   └── dataSource.ts
│   ├── entity
│   │   └── Person.ts
│   ├── routes
│   |   ├── index.ts
│   │   └── person.ts
│   └── app.ts
├── .env
├── .gitignore
├── package-lock.json
├── package.json
└── tsconfig.json
Step 3 - TypeScript Configuration
TypeORM에서 reflect-metadata 라이브러리를 사용할 수 있도록 tsconfig.json 파일을 열고 compilerOptions 항목에 다음 옵션들을 추가합니다.
{
  "compilerOptions": {
    // ...

    "experimentalDecorators": true /* Enable experimental support for legacy experimental decorators. */,
    "emitDecoratorMetadata": true /* Emit design-type metadata for decorated declarations in source files. */,
    "strictPropertyInitialization": false /* Check for class properties that are declared but not set in the constructor. */
    // ...
  }
}
Step 4 - .env 파일 생성
.env 파일이란?
env 파일은 환경 변수 파일을 의미하며 API 키나 DB 관련 정보 등 외부에 노출되면 안되고 개발자만 알아야하는 정보들을 저장하는데 사용됩니다.
.env 파일 설정
다음과 같이 프로젝트 최상위 디렉토리에 .env 파일을 생성하고 다음과 같이 MySQL 데이터베이스 관련 데이터를 입력합니다.
# DB 관련 데이터
DB_PORT=[데이터베이스 포트 번호 (MySQL 데이터베이스의 기본 포트는 3306입니다.) ]
DB_USERNAME=[데이터베이스 사용자 이름]
DB_HOST=[데이터베이스 호스트]
DB_PASSWORD=[데이터베이스 비밀번호]
DB_DATABASE=[사용하고자 하는 데이터베이스 이름]
예시를 들자면 다음과 같습니다.
DB_PORT=3306
DB_USERNAME=username
DB_HOST=localhost
DB_PASSWORD=password
DB_DATABASE=test
Step 5 - entity 생성
다음과 같이 /src/entity 디렉토리에 Person.ts 파일을 생성하고 다음과 같이 entity를 생성합니다.
import { Column, Entity, PrimaryGeneratedColumn } from "typeorm";

@Entity()
export class Person {
  @PrimaryGeneratedColumn()
  id: number;

  @Column("varchar", { length: 100 })
  name: string;

  @Column("int")
  age: number;

  @Column("varchar", { length: 100, unique: true })
  email: string;
}
Step 6 - DataSource Configuration
DataSource 객체 생성
/src/database 디렉토리에 dataSource.ts 파일을 생성하고 다음과 같이 DataSource 옵션을 입력합니다.
// data source and all connection configuration

import { DataSource } from "typeorm";
import { Person } from "../entity/Person";
import dotenv from "dotenv";

dotenv.config();

const AppDataSource = new DataSource({
  type: "mysql",
  host: process.env.DB_HOST,
  port: Number(process.env.DB_PORT),
  username: process.env.DB_USERNAME,
  password: process.env.DB_PASSWORD,
  database: process.env.DB_DATABASE,
  entities: [Person],
  synchronize: true,
  logging: false,
  dropSchema: false,
});

export default AppDataSource;
주요 옵션에 대해 설명하자면 다음과 같습니다.
type: 사용하고자 하는 데이터베이스 종류host: 데이터베이스 호스트port: 데이터베이스 포트 번호username: 데이터베이스 사용자 이름password: 데이터베이스 비밀번호database: 사용하고자 하는 데이터베이스 이름entities: 사용하고자 하는 entity 또는 entity schema 목록synchronize: true일 경우 서버가 재시작될 때마다 entities 항목에 등록된 entity 목록을 바탕으로 데이터베이스에 자동으로 테이블을 생성합니다. production 모드일 경우 반드시 false로 설정합니다.logging: TypeORM을 통해 실행되는 SQL 쿼리를 logging 할지 여부dropSchema: true일 경우 서버가 재시작될 때마다 데이터베이스 내의 모든 schema를 삭제합니다. production 모드일 경우 반드시 false로 설정합니다.
이외의 옵션에 대해서는 다음 링크를 참고하시길 바랍니다.
초기화
app.ts 파일을 열고 다음과 같이 database connection에 대한 초기화를 진행합니다.
import express from "express";
import { router } from "./routes";
import bodyParser from "body-parser";
import AppDataSource from "./database/dataSource";
import "reflect-metadata";

// to initialize the initial connection with the database, register all entities
// and "synchronize" database schema, call "initialize()" method of a newly created database
// once in your application bootstrap
AppDataSource.initialize()
  .then(() => {
    // here you can start to work with your database
    const app = express();
    const port = Number(process.env.PORT ?? 4000);

    // JSON 형태의 요청(request) body를 파싱(parse)하기 위해 사용하는 미들웨어(middleware) 적용
    // req.body를 사용하려면 JSON 미들웨어를 사용해야 합니다.
    // 사용하지 않으면 undefined 반환.
    app.use(express.json());

    // POST 요청 시 content 타입이 application/x-www-form-urlencoded인 경우 파싱
    // JSON 미들웨어와 함께 사용
    app.use(express.urlencoded({ extended: true }));

    // HTTP에서 Body를 파싱하기 위한 설정
    app.use(bodyParser.json());

    app.use(router);

    app.listen(port, () => {
      console.log();
      console.log(`  [Local] http://localhost:${port}`);
      console.log();
    });
  })
  .catch((err) => console.error(err));
Step 7 - TypeORM 사용 예시
Repository 사용
Repository를 사용하여 데이터베이스를 연동한 예시는 다음과 같습니다.
/* src/routes/index.ts */

import express, { NextFunction, Request, Response } from "express";
import { router as personRouter } from "./person";

export const router = express.Router();

// 라우터 설정
router.use("/person", personRouter);

router.get("/", (req: Request, res: Response, next: NextFunction) => {
  res.send("홈");
});
/* src/routes/person.ts */

import express, { NextFunction, Request, Response } from "express";
import AppDataSource from "../database/dataSource";
import { Person } from "../entity/Person";

export const router = express.Router();

// 모든 person 데이터 출력
router.get("/", async (req: Request, res: Response, next: NextFunction) => {
  const people = await AppDataSource.getRepository(Person).find();
  res.json(people);
});

// 특정 이메일로 person 찾기
router.get(
  "/:email",
  async (req: Request, res: Response, next: NextFunction) => {
    const person = await AppDataSource.getRepository(Person).findOne({
      where: {
        email: req.params.email,
      },
    });
    res.json(person);
  }
);

// person 데이터 추가하기
router.post("/", async (req: Request, res: Response, next: NextFunction) => {
  const { name, age, email } = req.body;
  const person = new Person();
  person.name = name;
  person.age = age;
  person.email = email;

  await AppDataSource.getRepository(Person).insert(person);
  res.send(`Person has been saved. Person id is ${person.id}`);
});

// person 데이터 수정하기
router.put(
  "/:email",
  async (req: Request, res: Response, next: NextFunction) => {
    const { name, age, email } = req.body;

    const person = await AppDataSource.getRepository(Person).findOne({
      where: {
        email: req.params.email,
      },
    });

    if (person) {
      person.name = name;
      person.age = age;
      person.email = email;
      await AppDataSource.getRepository(Person).save(person);
    }

    res.json(person);
  }
);

// person 데이터 삭제하기
router.delete(
  "/:email",
  async (req: Request, res: Response, next: NextFunction) => {
    const personRepository = AppDataSource.getRepository(Person);

    const person = await personRepository.findOne({
      where: {
        email: req.params.email,
      },
    });

    if (person) {
      await personRepository.remove(person);
    }

    res.sendStatus(204); // No content.
  }
);
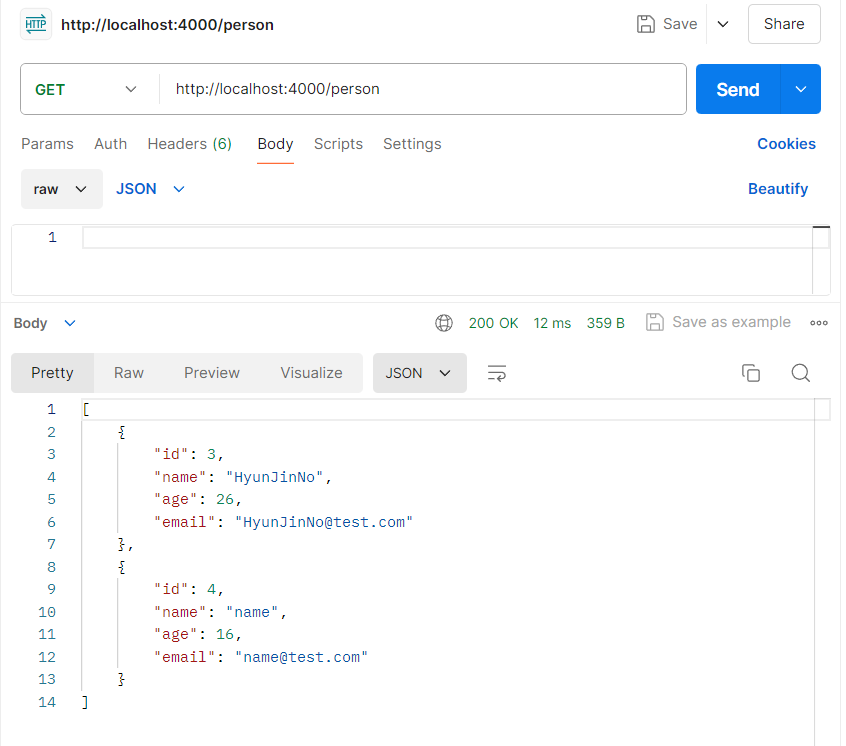
Postman 사용
Postman을 사용하여 API를 요청한 예시는 다음과 같습니다.